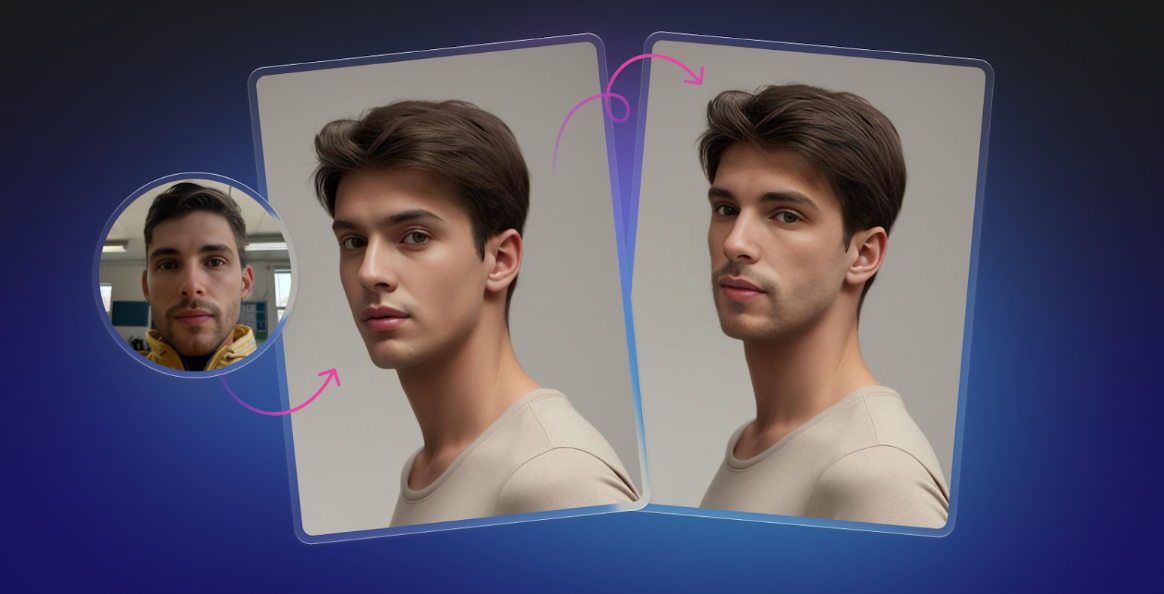
Face swapping usually belongs to smartphone apps and group chats. We stick a friend’s face on a movie poster, laugh, and scroll on. But generative models have matured. The tech has crossed the threshold from novelty to utility. For designers and marketers, altering identity in a photo now offers a solution to asset fatigue and privacy headaches.
Professionals aren’t asking “does it work?” anymore. They ask: “How do we use this responsibly without crossing ethical lines or sacrificing quality?” Icons8 entered this space to bridge the gap between mobile toys and manual Photoshop labor.
Understanding the Generative Approach
Early compositing tools just cut a face from Image A and pasted it onto Image B. Modern tools use generative adversarial networks (GANs). When you run faceswapper ai, the software analyzes facial landmarks. It reads the lighting, skin texture, and angle. Then, it generates a new face that exists somewhere between the source and the target.
It doesn’t copy-paste; it reconstructs.
That distinction matters. It solves the hardest part of manual compositing: matching the lighting. If your source image is in a dark room with blue light and the target is a bright studio headshot, the AI re-renders the features to match the source environment.
Scenario 1: Revitalizing Stale Stock Photography
Digital marketing has a repetition problem. You find the perfect image-great composition, perfect setting-but the model is recognizable. They’ve appeared in ads for three other competitors.
Here, a marketing manager uses the tool to keep the high-value asset (the photo’s composition) while changing the identity.
- Asset Selection: The marketer uploads the high-quality stock photo of a business meeting. This serves as the “body” image.
- Identity Selection: Instead of a real person (which introduces legal clearance issues), they pick an AI-generated face from the tool’s library or a platform like HeyPhoto.
- Processing: The tool swaps the face. Because output hits 1024px, it stays sharp enough for web banners and social feeds.
- Verification: A quick check of the history tab compares the before and after.
The result is a “new” person in the same scenario. You extend the lifespan of licensed stock without confusing the audience.
This approach handles privacy needs, too. Say a company wants to use a candid photo from an office event. An employee in the shot prefers not to be publicized. Swapping their face with a generated identity preserves the vibe while respecting their privacy.
Scenario 2: The Group Photo Rescue
Group shots suffer from the “one bad apple” syndrome. You burst-fire ten photos of a team. In the best shot, four people look great. One is blinking.
Manual retouching means finding a good face, masking it out, feathering edges, and color-correcting.
- Multiswap Setup: Upload the group photo where the majority looks good. The tool detects multiple faces.
- Targeting: Select the specific face that needs fixing.
- Source Input: Upload a different photo of the blinking subject-perhaps a solo portrait or a different take where their eyes are open.
- Selective Swap: The AI swaps only the selected face. The other four smiles remain untouched.
A “reject” photo becomes a deliverable asset in seconds.
A Narrative Example: The Content Manager’s Tuesday
Meet Javi, a content lead at a mid-sized tech firm. It’s 10:00 AM. He needs a hero image for an article about “Remote Work Frustrations.”
Javi finds a library photo of a person at a laptop. The composition works, but the subject looks too happy. The article is about burnout; the smile clashes with the headline. He has no budget for new assets.
Javi opens the swapper in his browser. He drags the “happy laptop” photo into the upload zone. Next, he needs a tired face. He browses the built-in gallery but decides to upload a specific AI-generated face he created earlier that looks suitably exhausted.
He hits process. The AI maps the “exhausted” features onto the “happy” head pose.
The result is a seamless image of a person looking stressed at a computer. The lighting from the laptop screen reflects correctly on the new face. Javi notices the resolution is 1024×1024. The blog header needs more width, so he uses the integrated Smart Upscaler to bump the resolution without losing fidelity.
By 10:15 AM, the image is live. He didn’t open Photoshop. He didn’t bother the design team.
Comparing the Options
Face manipulation falls into three distinct tiers.
Manual Compositing (Photoshop):
- Pros: Infinite control, maximum resolution, professional standard.
- Cons: Extremely time-consuming. Requires high skill to match grain and lighting.
- Verdict: Necessary for billboards, overkill for a blog post.
Mobile Entertainment Apps (Reface, FaceApp):
- Pros: Fast, fun, mobile-first.
- Cons: Aggressive compression results in low-res output. Watermarks are common.
- Verdict: Good for memes, bad for business.
Icons8 Face Swapper:
- Pros: Handles up to 1024px output. Runs in the browser. Offers specific features like multiswap.
- Cons: Less control than manual editing.
- Verdict: The “middle path” for creators who need speed but decent quality.
Limitations and When to Avoid
This isn’t magic. Users must accept specific constraints to avoid frustration.
The Obstruction Issue
The AI struggles with obstructed faces. If the subject has a hand over their mouth, wears a heavy medical mask, or has thick-rimmed glasses, artifacts appear. The algorithm tries to “guess” what is behind the obstruction, often creating a blur.
Extreme Angles
Front-facing or side portraits work best. A severe 3/4 head position or a profile shot where one eye is hidden can confuse the mapping. The result might look flattened.
Resolution Ceiling
1024px is excellent for AI tools. But in the print world, it’s small. If you are designing a magazine cover or a large poster, use this tool only for the initial mock-up.
Practical Tips for Best Results
Treat this like a photographic process, not a digital stamp.
- Match the Head Shape: While the AI adjusts features, swapping a round face onto a narrow skull looks uncanny. Match the general head shape of the source and target.
- The “Skin Beautifier” Hack: Upload the same photo as both source and target. The AI re-processes the face, often smoothing texture and blemishes without changing identity. It acts as an automated retoucher.
- Mind the File Types: The tool accepts JPG, PNG, and WEBP up to 5 MB. Convert massive RAW files before uploading.
- Privacy Hygiene: The platform stores images securely, but best practice dictates clearing your history if you work with sensitive client assets. Delete images permanently via the interface immediately after downloading.
View this tool as a way to “remix” reality rather than perfect it. It fills the gap between the casual meme and the professional retouch, offering a valid workflow for the high-volume demands of modern content.